Elena - Manual
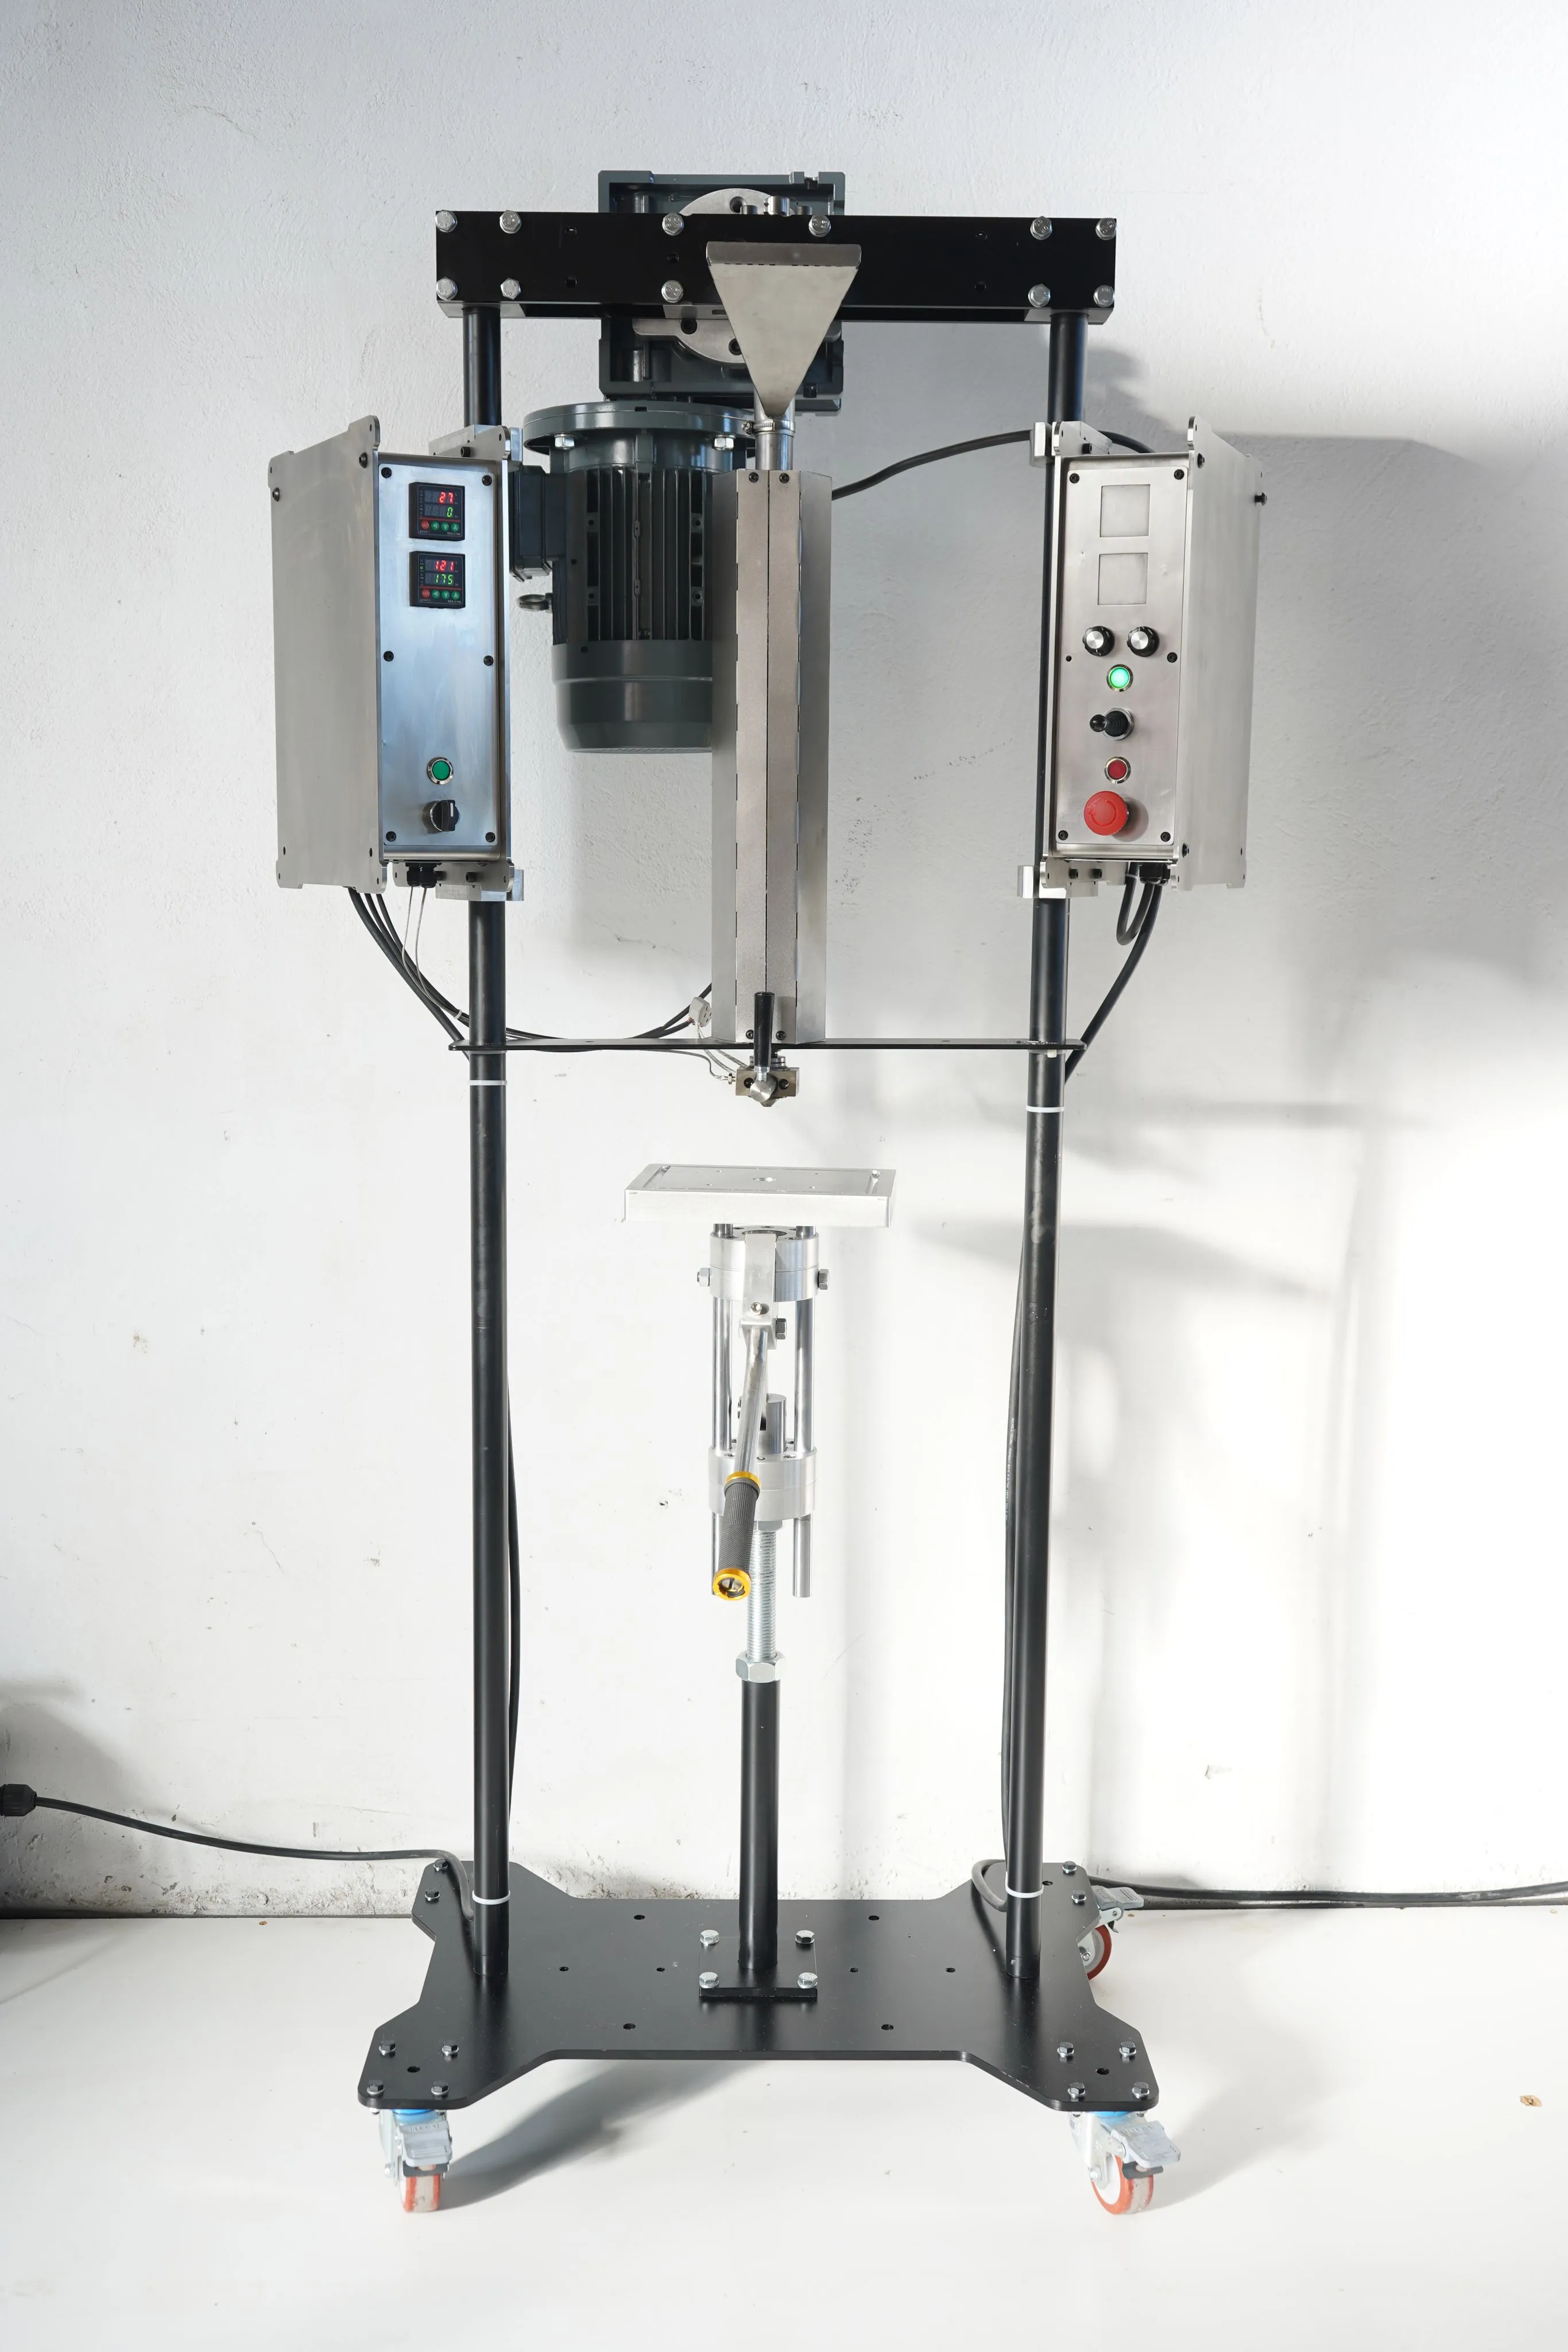
Plunger Component - User Manual
Section titled “Plunger Component - User Manual”This document describes how to operate the Plunger component using the joystick and understand its different modes.
See also Wifi Settings
References
Section titled “References”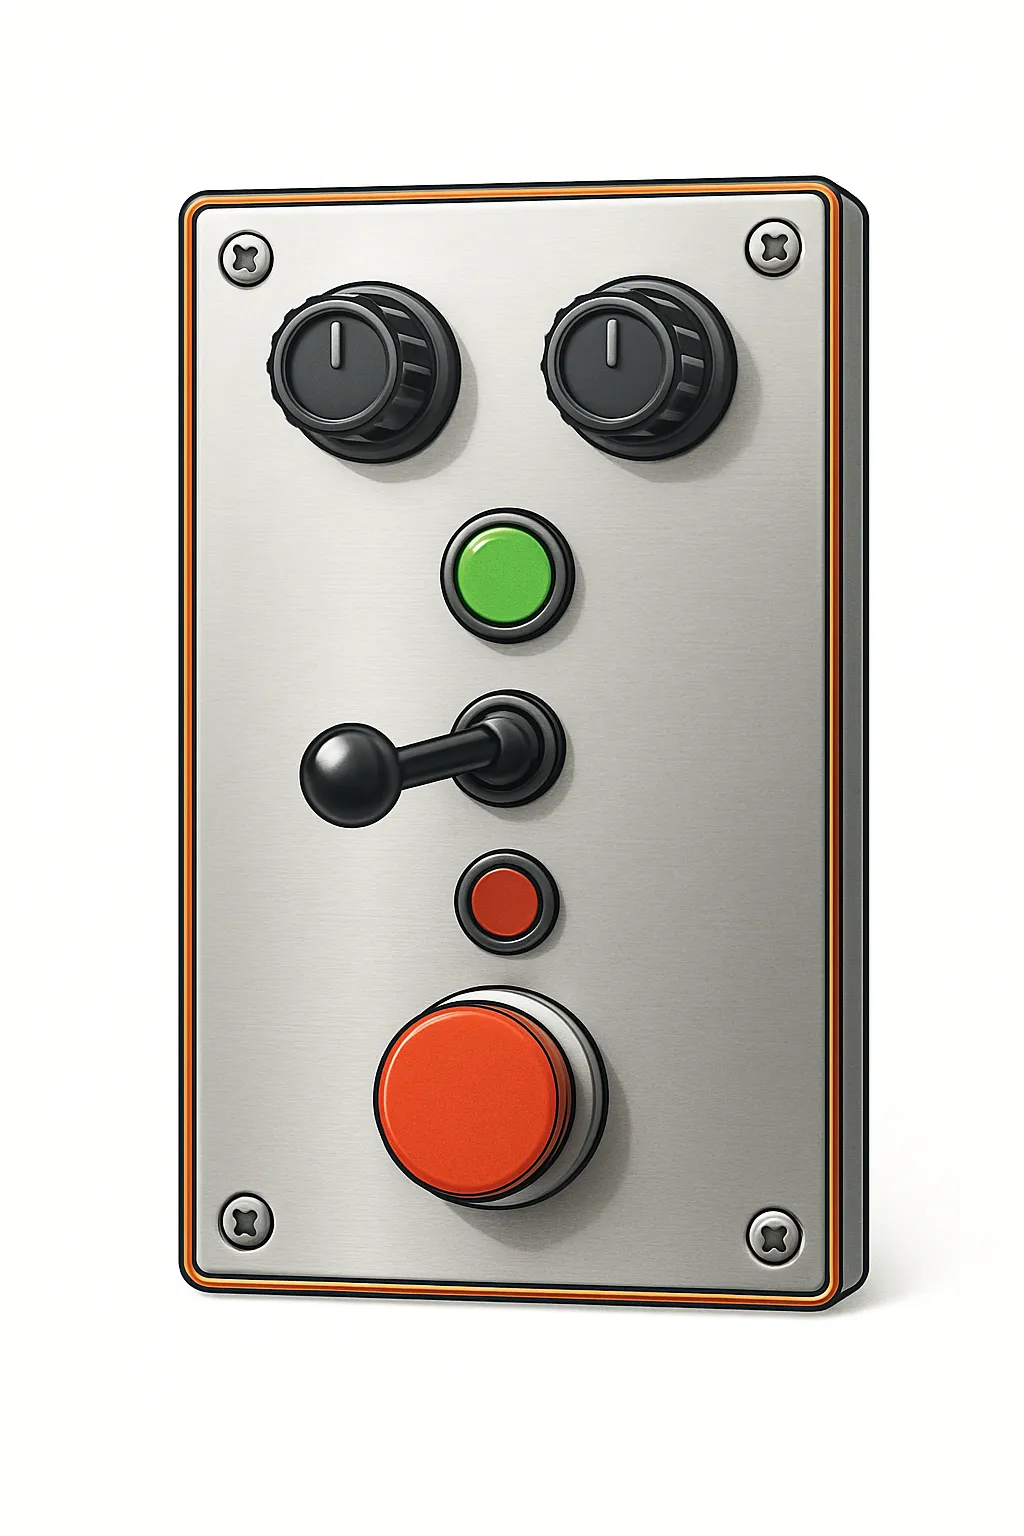
Joystick Operations
Section titled “Joystick Operations”The joystick controls the primary functions of the plunger. When Auto Mode is enabled, holding the joystick in a direction for an extended period can trigger automatic continuous movement.
Joystick Directions:
- UP: Move Plunger UP (Homing/Retracting)
- DOWN: Move Plunger DOWN (Plunging/Extending)
- LEFT: Initiate FILLING sequence
- RIGHT: Initiate RECORD or REPLAY sequence
- CENTER: Stop manual movement / Neutral position
1. Speed Control Dial (Potentiometer)
Section titled “1. Speed Control Dial (Potentiometer)”The Plunger is equipped with a speed control dial. This dial allows you to adjust the downward plunging speed.
- Function: Turning the dial will increase or decrease the speed at which the plunger moves downwards during Manual Plunging, Automatic Plunging, Record mode, Replay mode, and the plunging phase of the Filling sequence.
- Note: The upward homing speed (including during the filling sequence’s homing phase) is generally fixed at a slower, safer speed and is not affected by this dial.
2. Sensitivity Dial: How Quickly the Plunger Stops
Section titled “2. Sensitivity Dial: How Quickly the Plunger Stops”This dial adjusts the plunger’s sensitivity to resistance when moving DOWN, determining how quickly it stops upon encountering an obstruction, such as the mold or solidified plastic.
-
Function: Controls the threshold for the plunger to register a “jam” or “obstruction” during its downward movement.
-
How to use it:
-
High Sensitivity (e.g., dial turned to MAX):
- Result: The plunger stops immediately upon minimal contact or resistance.
- Use this when: Precision is critical, and you want the plunger to stop at the slightest touch, preventing over-injection or damage to delicate molds.
-
Low Sensitivity (e.g., dial turned to MIN):
- Result: The plunger will apply more force before stopping, allowing it to push through minor resistances.
- Use this when: The injection process requires more force to fill the mold completely, and minor obstructions are expected.
-
In-between settings: Adjust to find the optimal balance for your specific material and mold.
-
-
Important: This setting primarily affects the DOWNWARD (plunging) movement. Upward movement (homing) is not affected.
3. Manual Plunging (Moving Down)
Section titled “3. Manual Plunging (Moving Down)”- Action: Push the joystick DOWN.
- Result: The plunger will start moving downwards. The speed is determined by the Speed Control Dial.
- To continue moving manually, keep the joystick held DOWN.
- To stop manual movement, release the joystick to the CENTER position. The plunger will stop.
- Automatic Plunging (if “Auto Mode” is enabled):
- If you continue to hold the joystick DOWN for more than 3.5 seconds, the plunger will switch to Automatic Plunging mode.
- Once in Automatic Plunging, you can release the joystick to the CENTER position, and the plunger will continue moving down at the speed set by the Speed Control Dial.
- To stop Automatic Plunging: Move the joystick to any other position (e.g., UP, LEFT, RIGHT, or briefly back to DOWN then CENTER). The plunger will stop.
4. Manual Homing (Moving Up)
Section titled “4. Manual Homing (Moving Up)”- Action: Push the joystick UP.
- Result: The plunger will start moving upwards at a fixed slow speed.
- To continue moving manually, keep the joystick held UP.
- To stop manual movement, release the joystick to the CENTER position. The plunger will stop.
- Automatic Homing (if “Auto Mode” is enabled):
- If you continue to hold the joystick UP for more than 3.5 seconds, the plunger will switch to Automatic Homing mode.
- Once in Automatic Homing, you can release the joystick to the CENTER position, and the plunger will continue moving up.
- To stop Automatic Homing: Move the joystick to any other position. The plunger will stop.
5. Filling Sequence
Section titled “5. Filling Sequence”This automated sequence compresses plastic pellets and flakes in the barrel.
- Purpose: The plunger moves down to compress material until it detects a jam, then retracts to the top.
- Action: When ready, push and HOLD the joystick to the LEFT for at least 2.5 seconds.
- Process:
- Plunger moves DOWN (speed set by Speed Control Dial) until a jam.
- After a brief pause, plunger moves UP (fixed slow speed) until a jam at the top.
- The sequence completes, ready for a new command.
- To Abort: Move the joystick in ANY direction from CENTER during the sequence.
6. Record & Replay Plunge Duration
Section titled “6. Record & Replay Plunge Duration”This feature allows you to record a specific plunging duration and then replay it. The plunging speed during record and replay is affected by the Speed Control Dial.
6.1. Record Plunge Duration
Section titled “6.1. Record Plunge Duration”- Action: When the plunger is not moving and ready, push and HOLD the joystick to the RIGHT for at least 3 seconds.
- Result:
- The plunger enters Record Mode and starts moving DOWN at the speed set by the dial.
- Keep holding the joystick RIGHT for the desired duration of the plunge.
- Release the joystick (to CENTER or any other direction) when you want to stop recording the plunge.
- The duration of this plunge is now recorded. The plunger stops and is ready for a new command.
- Maximum Record Time: The recording will automatically stop if it exceeds 20 seconds.
6.2. Replay Recorded Plunge
Section titled “6.2. Replay Recorded Plunge”- Action: When the plunger is not moving and ready, briefly TAP the joystick to the RIGHT (push and release quickly, holding for less than 3 seconds).
- Result:
- If a plunge duration has been previously recorded (or set via settings), the plunger enters Replay Mode.
- It will automatically plunge DOWN for the recorded duration, at the speed set by the dial.
- After the duration, it will stop and become ready for a new command.
- The default replay duration if no recording has been made or loaded from settings is 4.5 seconds.
- To Abort Replay: During replay, moving the joystick in ANY direction away from CENTER will stop the replay, and the plunger will become ready for a new command.
- No Recording: If you tap RIGHT and no duration has been recorded or set, nothing will happen.
7. Jammed State and Resetting
Section titled “7. Jammed State and Resetting”- Indication: If the plunger encounters excessive resistance during any movement (manual, auto, fill, record, replay), it will become jammed, and the motor will stop.
- To Reset from a Jam:
- Ensure the joystick is in the CENTER position. The system is now attempting to clear the jam.
- From this state, push the joystick UP. This will try to fully reset the VFD fault and start moving the plunger upwards manually.
- If you move the joystick to any other direction (not UP) while it’s attempting to clear a jam (after first centering it), it will also try to reset the VFD fault and then become ready for a new command. A manual VFD reset by a technician might sometimes be needed if this occurs and the VFD remains unresponsive.
- The exact timings mentioned are based on current default settings but can be configured via a settings file (see Advanced Controls section if available).
- Adjust the Speed Control Dial to change the downward plunging speed for most operations.
- Always ensure the area around the plunger is clear before operation.
- Pay attention to system warnings or error messages if the plunger behaves unexpectedly.
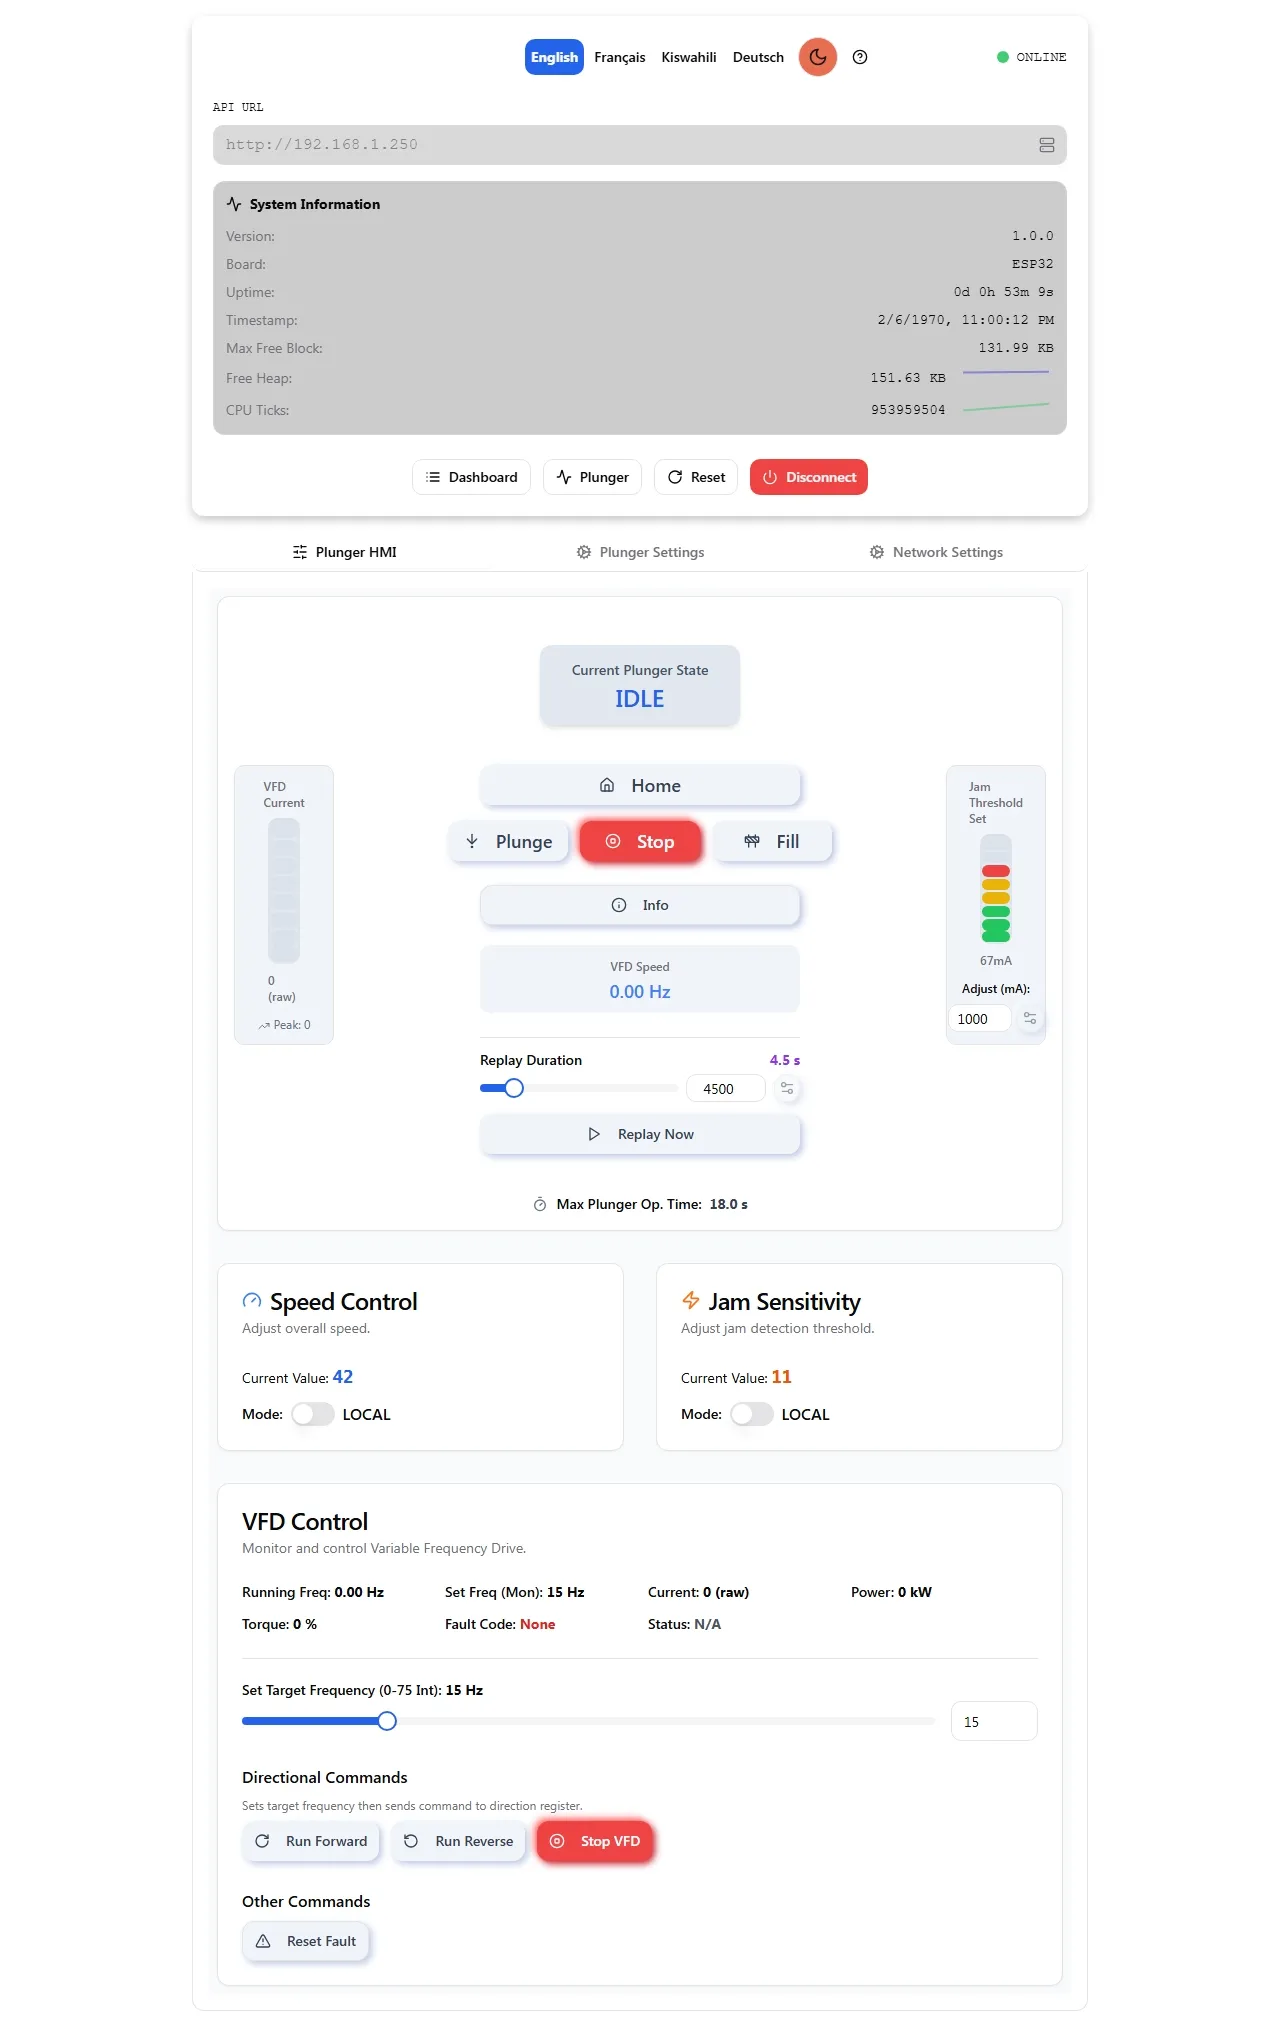
Web Interface
Section titled “Web Interface”